anthony paul lopez
producer, recording + mixing engineer, drummer

quail
Having a recording studio in our home has been a pipe dream of mine since I first started playing drums at 11. I never thought I'd end up building it with my own hands, from start to finish, with only the help of my family and friends. To this day it was one of the most difficult projects I've completed; I can't thank my brother and wife enough for their help and patience. I hope this document can help shine a light on the process and provide proof that maybe something like this can happen for you as well.

I spent about 3 years researching and designing a generic"home studio" in Sketchup, later taking an additional year to alter its design to fit the existing garage on our property. I believe the drawing below is version 5.3.

We utilized what's called "double-leaf" wall construction to decouple the walls of each room. Each leaf (surface) has a gap to prevent any sound transference from one structure to the other. The gap is dampened with insulation to further deaden any vibrations and prevent resonance.


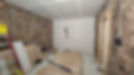
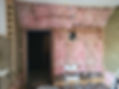
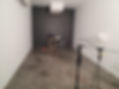
The existing garage.

Each leaf is made up of doubled layers of 5/8" Type X fire-rated drywall - this meant I had to double up the existing garage's drywall (outer leaf) and patch up any holes/windows. We used Green Glue compound between drywall layers.


Doing some visualization and fine tuning of the room sizes before committing.

Maybe it was overkill, but I mapped out every detail in Sketchup down to the studs. This made ordering materials pretty easy considering I had a near exact count of every piece of every material we'd need for the build.


We went with steel framing for a couple reasons - at the time, the price of lumber had skyrocketed to the point where the price in our area was comparable. It also allowed me to do a good chunk of framing on my own since I could build each wall one stud at a time. The load rating of the joists also allowed for a larger span without having to sacrifice ceiling height.


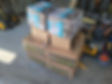
Ventilation is often overlooked in studio design. If the idea is to build an airtight room, fresh-air circulation seems pretty important. These silencer boxes act as mufflers to diffuse and prevent sound from escaping while also allowing fresh air in and out of the rooms. Since there are two rooms, I needed to build 8 boxes total - 2 for outer leaf fresh-air, 2 for outer leaf exhaust, 2 for inner leaf fresh-air, and 2 for inner leaf exhaust.


These things are massive, by the way. Getting them into the attic sucked.

Using Romex was a choice but it kept the job fairly easy. I probably could've saved money by star grounding another way, but running conduit and individual wire was a bit beyond me. At this point, the build was getting to me mentally. I was burnt.


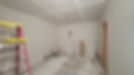
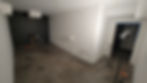
Fluffy fiberglass works well as an "air gap" insulation - the key is not to compress it so much to the point where it starts transferring vibrations/sound. Once installed, having the separation between rooms made the studio feel real, if that makes sense. It was a much needed boost in mood.


Due to the weight of the doors, the jambs had to be made of hardwood. I used red oak for the "hinge" side of the jamb but honestly should've just used red oak all the way around (the fir warped enough to make hanging doors a pain). The price of each 6' piece was around $80 if I remember correctly.
Ventilation is handled with this HRV - I scored this one off Craigslist.


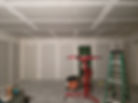
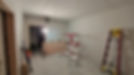
Drywall took the most amount of time and honestly, the most amount of mental fortitude. The next month of hanging and finishing drywall would end up breaking me - I can't stress how grateful I am for my wife and my brother for their support and patience during this time period.


"It'll be worth it" - Me, to myself, every day.


Shoutout to Vancouver Carpenter for his tips on drywall finishing.

I was on tour at this point but my lovely wife and our extremely talented friend Kim Zsebe kept the train rolling by painting the walls and coordinating the mini-split installation.


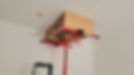
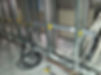
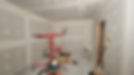
These are the four final silencer boxes that needed to be installed. Mounting them would've been impossible without the drywall lift.


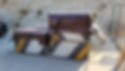
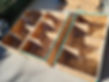
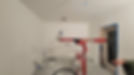
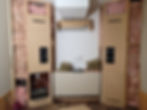
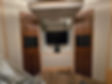
Building speaker soffits was much more familiar and fun, even though measuring the exact angles and heights was tedious, it didn't require the same kind of physical exertion as something like framing or drywall. Plus, seeing the room so close to its final form was a huge lift for my mental state.

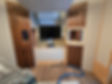
This little computer cubby also has silencer boxes built in above and below, scaled for the smaller CFM needed.


I took the time to measure out and mark a "sweet spot" for optimal listening position, and then I remembered I'll be covering that area with a rug.

This is about as thought out as my plans were for mix room treatment - I knew what material I wanted to use and how much, but wasn't sure how to execute it exactly.


The chicken wire acts as a cooling/ventilation path for the speakers. I'll end up installing thermally controlled fans back there as well.

Baseline measurements looked pretty bad, as they should.


The reverb in the live room was too good to not capture as an IR. I'll share it someday once I learn how to get it to work.

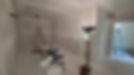
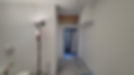
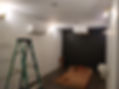
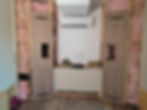
Installing lights and electric outlets meant we no longer had to use shop lamps or extension cords - this was huge.


I don't know what I was expecting but fabric ended up being way more tedious than I thought. We went with a 10oz duck canvas. My only regret is not using furniture padding behind the fabric to prevent denting. It's held up well so far, but maybe that'll be a job in the future.

Soffits seem to be their own science - the angles, material density, size, placement, mounting technique.. all of it seems to make a difference. I chose to mount these speakers using an idea Thomas Barefoot posted on a forum a while ago. I'm using ratchet straps and sorbothane pads to tie down each speaker with just enough pressure to "float" them on the shelves within the soffit. I was kind of unsure about it but... it works. Really well, actually.


"It'll be worth it."


The doors are fire-rated and solid core with an additional piece of 3/4" MDF attached. If more isolation was needed, we could've attached another piece of MDF, but this turned out to be plenty. I over-spec'd the hardware and used six industrial hinges per door.


"It'll be worth it."

A pretty big improvement from the first graph, but I'll end up fine tuning the room a bit more with additional treatment and by actually installing all of the doors.
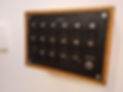
It's probably fair to call this the final stretch even though there was still a lot of work to be done. It was all about finishing wiring, building the rest of the doors, building storage, and moving in. Redco fabricated these panels that I mounted to boxes made with leftover red oak.


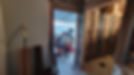
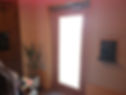
The glass in this door is custom ordered double-layered tempered and laminated security glass. This material is particularly dense, meaning sound is less likely to pass through it than the double layered drywall. It works extremely well, and honestly the natural light makes it worth the cost.


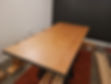
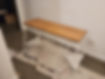
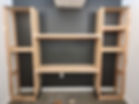
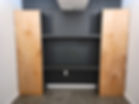
The final major step was building these storage shelves for drums.
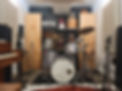


At the time of writing this, it's been about three years from completion and the studio has been fully-functioning and used on some truly amazing records. And even though I love my PMC twotwo6s, I couldn't help but imagine the room with a pair of the newer, sexier PMC 6-2s.


It was worth it.
A massive thank you to everyone at the Soundman2020 and John L. Sayers studio design forums for sharing their expertise and knowledge. These are unbelievable resources with some incredible heavy hitters in studio design and acoustics. Rod Gervais's Build It Like The Pros is another excellent resource if you're interested in designing and building your own studio.